





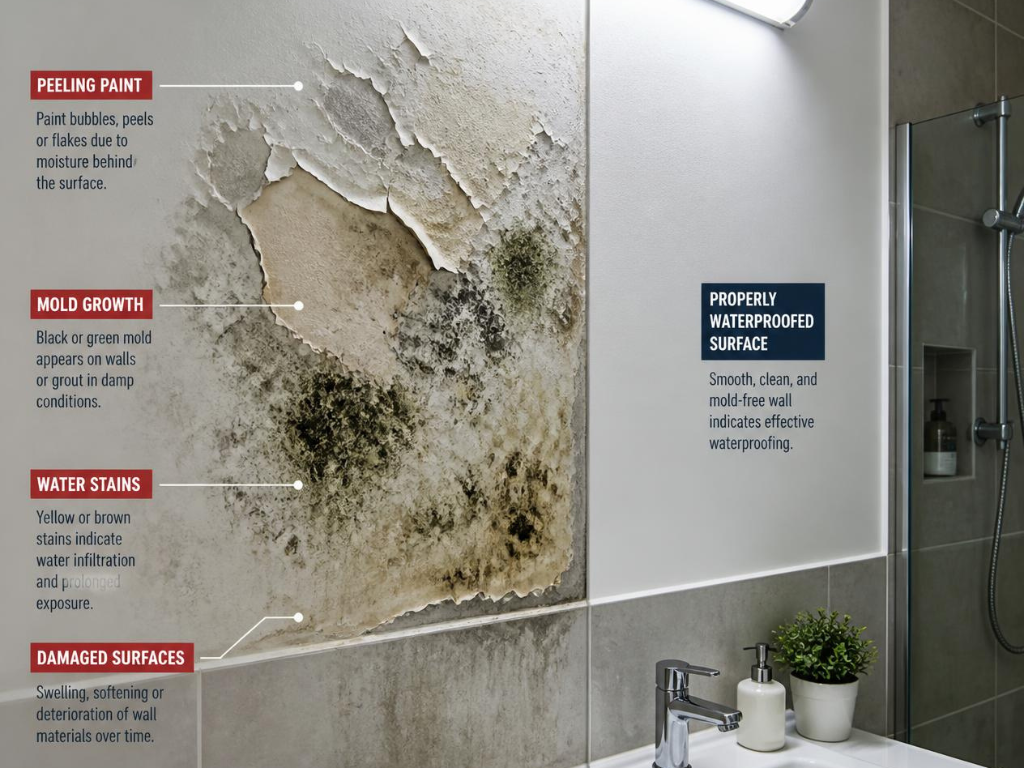
27 Aug 7 Signs Your Bathroom Waterproofing Has Failed
The signs bathroom waterproofing has failed appear in a predictable order, months before anything drips. Catching it at the first sign is a resealing job. Catching it at the last means a 25% share of a repair bill under HDB’s Goodwill Repair Assistance scheme, a neighbour, and a hacked bathroom. This blog walks you through all seven in sequence, alongside waterproofing and seepage repair scope.
Proseal Contracts Pte Ltd is a BCA-registered waterproofing specialist and licensed building contractor founded in Singapore in 1999, working under workhead CR13, Waterproofing Installation.
What are the seven signs, and how urgent is each one?
Each sign marks a depth the water has reached, which is why the order matters more than the list. Silicone failure is surface level. A ceiling stain below means the water has crossed the slab.
| # | Sign | Water has reached | Urgency |
| 1 | Silicone gap or cracking at the wall-floor junction | The joint surface | Early |
| 2 | Grout darkening in floor lines | Into the grout | Early |
| 3 | Efflorescence, white powdery deposit | Through the screed | Early to intermediate |
| 4 | Persistent musty smell after ventilation | Substrate, sustaining growth | Intermediate |
| 5 | Mould on skirting, wall base or ceiling corners | Substrate and adjacent walls | Intermediate |
| 6 | Hollow sounds or loose tiles underfoot | The adhesive layer, saturated | Late |
| 7 | Water stain or drip on the ceiling below | Across the slab | Act now |
Signs 1 to 3 usually leave options short of hacking. From sign 4 onward the substrate is wet, and by sign 6 a new membrane has nothing sound to bond to. One sign present is worth an inspection. Two or more confirms the waterproofing has failed.
The timing between stages is not fixed, but the direction is. Nothing on this list reverses on its own, and each stage makes the next one cheaper to reach. Silicone that has opened admits water to a joint that was already the weakest detail in the room, which is why the gap between sign 1 and sign 3 tends to close faster than owners expect.
Sign 1: silicone gaps or cracking at the wall-floor junction
The silicone line where the tiled wall meets the tiled floor is the most common water entry point in any bathroom, and it is the earliest thing to go. Run a finger along it. Any flake, gap or softness means it needs replacing now.
Silicone is a consumable, not a permanent detail. It typically lasts 3 to 5 years before mould growth, cleaning chemicals and normal movement degrade the bond. The same applies around a shower base, a bathtub edge and the base of the toilet bowl.
What makes this sign useful is that it is the last line of defence rather than the first. Behind that silicone sits the membrane and the wall-to-floor junction, which is where most wet area failures begin because it is the hardest detail to execute. Once the silicone opens, water starts reaching a junction that is already the weakest point in the system.
Caught here, remediation is resealing and nothing more. This is the only sign on the list where a competent handyman is enough and a specialist is not required, which is exactly why it gets left for another year.
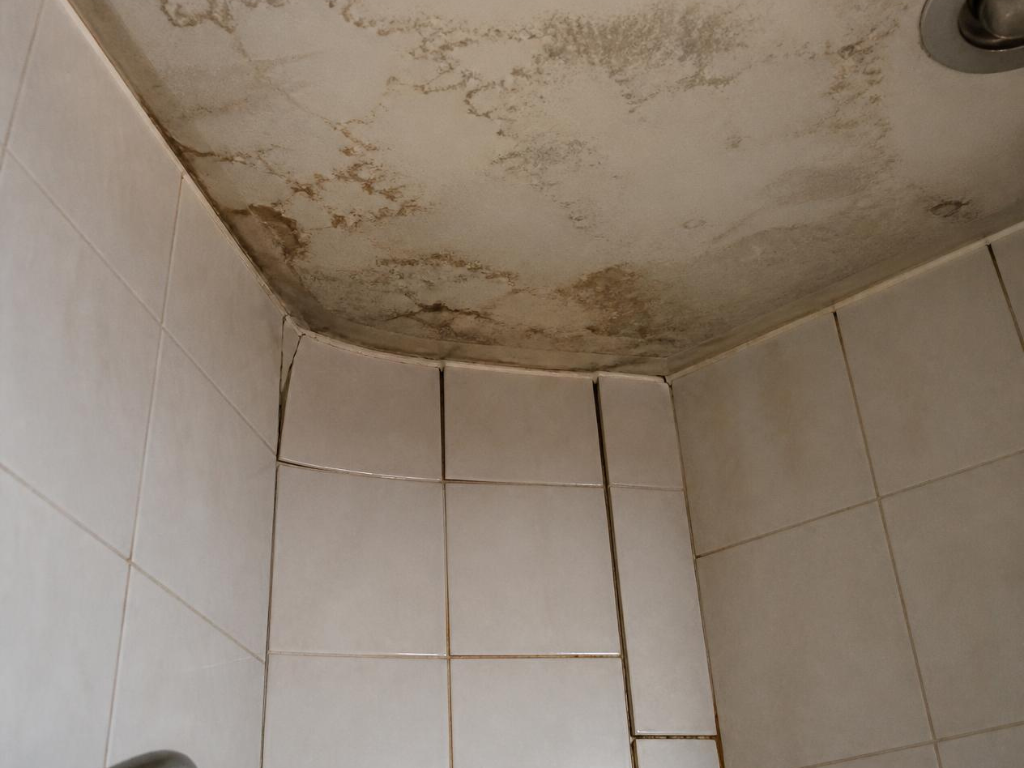
Sign 2: grout darkening between the floor tiles
Grout is porous. When it turns from light grey or white to dark grey, brown or patchy, water has been absorbing into it for weeks or months rather than days.
Separating real absorption from cosmetic staining is straightforward. A cosmetic stain is uniform, follows the traffic and cleaning pattern, and responds to grout cleaner. Water absorption is patchy, concentrates in the shower zone and around the floor trap, and does not lift with surface cleaning. Clean a section thoroughly and check it a week later; if the darkening returns in the same places, the water is coming from inside the joint.
Two causes account for most cases: the grout sealer has worn off, or water is pooling because the floor no longer drains within about 30 seconds of a shower ending. The second is a falls problem, and no amount of regrouting fixes it.
Caught at this stage the substrate is usually still dry and the waterproofing is working hard but holding. Regrouting and resealing resolves it, provided drainage is corrected at the same time.
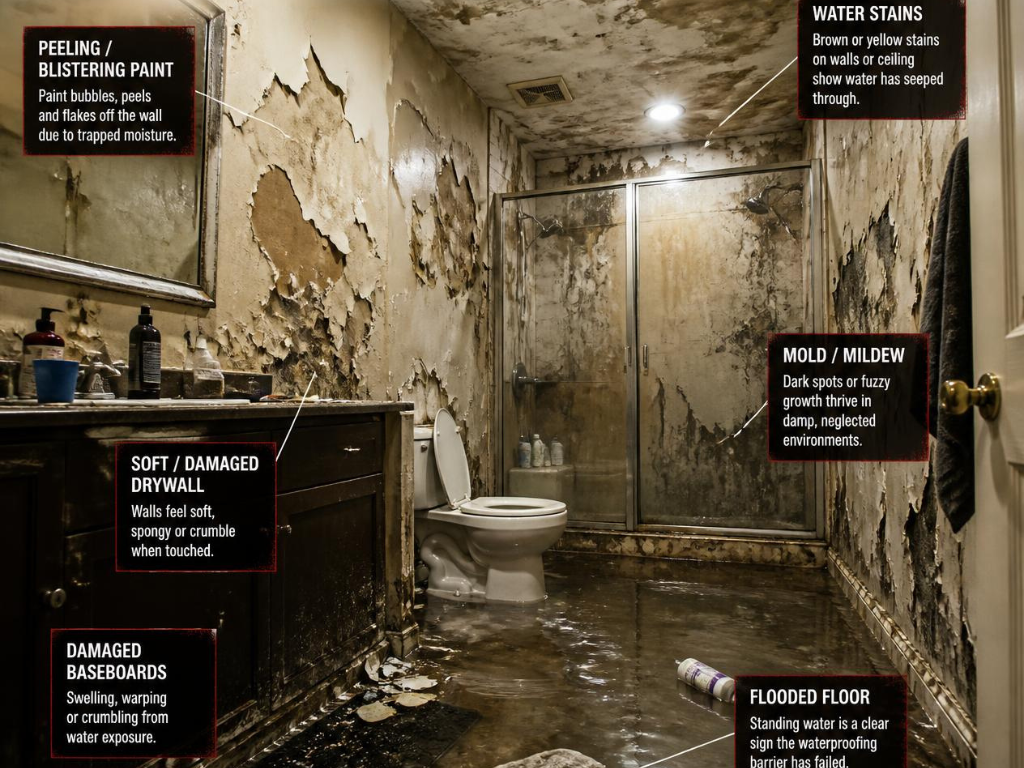
Sign 3: efflorescence, the white powdery deposit on tiles or grout
Efflorescence is chemical evidence that water is moving through your substrate. It is not a cleaning residue and it is not a mineral deposit from your shampoo.
The mechanism is specific. Water travelling through the screed dissolves calcium and alkaline salts out of the cement, carries them to the surface, and leaves them behind as it evaporates. The white chalky deposit that appears on grout lines, tile edges and the wall base is what remains. That makes it the most reliable of the early signs, because it cannot occur without water movement inside the layers your tiles are supposed to protect.
Verify it with two checks. Wipe it off with a damp cloth; if it reappears within a week, it is efflorescence rather than residue. And look at where it sits, because it concentrates at the lowest points water reaches, typically the skirting line and tile edges near the floor trap.
Seeing efflorescence means the membrane has a breach somewhere upstream. The reason bathroom waterproofing explained as a system rather than a coating matters here is that the breach is rarely where the deposit appears.
Sign 4: a musty smell that survives ventilation
A damp, earthy smell that does not clear after running the exhaust fan means moisture is trapped inside the substrate or behind the wall tiles, feeding microbial growth you cannot see yet. It is strongest in the morning or after the bathroom has been shut for several hours.
Distinguish it from a drain smell by its behaviour. A floor trap smell is intermittent, comes from the drain, and reduces after cleaning or refilling the trap. A waterproofing smell is constant, ignores drain treatment, and is strongest near the wall bases and skirting rather than at the drain.
The smell precedes visible mould by weeks. That gap is the useful part: it means the substrate has been wet long enough to sustain microbial life while the surface still looks fine.
The US Environmental Protection Agency advises drying water-damaged materials within 24 to 48 hours to prevent mould growth, and keeping indoor humidity below 60%. Singapore sits at the fast end of that window year round, in the room with the least ventilation in the house. At this stage a moisture reading is the only way to know whether an overlay is still viable.
Sign 5: mould or black spots on skirting, wall base or ceiling corners
Visible mould means the substrate has been wet long enough for fungal colonies to establish, which takes sustained moisture rather than an occasional splash. Where it appears tells you where the water is going.
Mould on the skirting inside the bathroom points at membrane failure at the floor-to-wall junction. Mould on the ceiling of the room below the bathroom is early-stage inter-floor leakage and belongs in sign 7’s category, not this one. Mould on the bathroom’s own ceiling points at the shower zone wall waterproofing, with water tracking upward behind the tiles.
Bleaching and repainting is the response most owners reach for and it is the wrong one. It removes the colour and leaves the water, and the mould returns within weeks, usually across a wider area because the moisture has continued spreading in the meantime.
Where there are children, elderly residents or anyone with respiratory sensitivity in the home, this sign moves up the priority order regardless of what it costs to resolve. The EPA recommends holding indoor humidity between 30% and 50% for the same reason.
Sign 6: hollow sounds or loose tiles underfoot
Tap ten spots across the floor with a metal spoon or a key. A hollow “tock” instead of a solid “thud” means the adhesive beneath that tile has lost its grip. More than two hollow spots out of ten indicates significant bonding failure.
Tile adhesive is cement-based. Kept wet for months it softens and releases from both the tile above and the substrate below. Hollow tiles are therefore not a tiling defect, they are a duration signal: water has usually been sitting under that floor for twelve months or more by the time the sound changes.
Other symptoms arrive with it. The floor feels slightly springy in specific zones, tiles crack without impact, and grout lines sit fractionally raised or depressed against their neighbours.
This is the sign that closes off the cheaper option. An overlay bonds to whatever sits beneath it, and beneath a hollow tile is failing adhesive over saturated screed. Applying a new membrane there buys months, not years, because the layer it is stuck to is already letting go. From this sign onward, hacking is the honest answer.
Sign 7: a water stain or active drip on the ceiling below
Water has crossed the slab. In an HDB flat or a condo that means your neighbour’s ceiling, and the situation is now compounding daily rather than gradually.
It arrives in three stages. A patch stain first, with discolouration and bubbling or flaking paint but no active water. Then a damp patch, soft to the touch, expanding week by week. Then an active drip, usually during or shortly after the bathroom above is used.
Two things make delay expensive beyond the repair itself. Water reaching the reinforcement inside an RC slab starts corrosion, which becomes a structural problem rather than a waterproofing one. And the neighbour below acquires a legitimate grievance that escalates through channels once patience runs out.
Establishing the cause matters as much as the cure here, because whether the leak is wear and tear or defect determines who pays, as the next sections set out. Confirming that the source is your bathroom rather than a pipe or the unit’s own slab is the first step, and a ceiling leak diagnosis guide covers how that gets established.
How do you check which sign you are actually seeing?
Four checks, none of which need a contractor, and they take about twenty minutes between them.
Walk the bathroom in daylight and photograph anything abnormal with a date stamp: silicone lines, grout colour, wall bases, ceiling corners. The photographs matter more than the observation, because a boundary that has advanced in three weeks proves an active problem in a way a single image never does.
Close the bathroom for two to three hours, then walk in and smell it before the extractor runs. A persistent musty smell with no drain source is sign 4.
Tap ten spots across the floor. More than two hollow is sign 6.
Then ask the unit below whether they have noticed any ceiling staining. Most neighbours would far rather be asked than discover it themselves later, and the answer overrides every other check on this list.
Two or more signs present means the waterproofing has failed and a professional diagnostic should be booked within two weeks. One sign, in the range of signs 1 to 3, means you have caught it early.
What should you do next?
Match the response to the sign, because the gap between the cheapest and most expensive correct answer here is roughly tenfold and choosing wrongly in either direction costs money.
At signs 1 to 3, document with dated photographs and get a site inspection within four weeks. Remediation at this stage is usually resealing, regrouting or an overlay, and the substrate is often still sound enough to make the cheap answer the right one.
At signs 4 to 6, book the inspection within two weeks and expect it to include substrate moisture readings. Partial or full hacking becomes likely as the readings come back, because a membrane laid over saturated screed blisters from below within one dry season.
At sign 7, act within 72 hours. Notify the unit below in writing, and the MCST as well if you are in a strata development, because that written record is what a shared-cost resolution later rests on. Keep every report and receipt. Where the leak sits at a junction or a crack rather than across the whole floor, PU injection repair sometimes resolves it without hacking, and the ceiling below will need ceiling leakage repair service regardless of which method fixes the source.
Who pays depends entirely on the cause. Under HDB’s Goodwill Repair Assistance scheme, described in its ceiling leaks guidance, HDB co-pays 50% of the repair cost where the cause is wear and tear, and the remaining 50% is split equally between the upper and lower flat owners. Each owner pays 25%. Where the leak was caused by renovation works in the upper flat, GRA does not apply and that owner bears the full cost. Whoever carries it, the remedial work belongs with a firm registered under BCA workhead CR13, Waterproofing Installation.
Conclusion
Every sign is the same failure at a different depth, which is why the order tells you more than the symptom does. Silicone and grout are surface problems. Efflorescence and musty air mean the water is inside the screed. Hollow tiles mean it has been there a year. Cost roughly tenfolds across that range, and the only variable you control is how early you look for it.
Send dated photographs and your property type through the contact form or call 8688 8600. Proseal provides written diagnostic findings matched to the severity, not a default recommendation to hack.
FAQs About Signs Bathroom Waterproofing Has Failed
Who pays for the repair when there is an inter-floor leak in an HDB flat?
Where the cause is wear and tear, HDB’s Goodwill Repair Assistance scheme co-pays 50% and the remaining 50% is split equally, so each flat owner pays 25%, subject to a cap per repair location. Where renovation works in the upper flat caused it, that owner bears the full cost.
Can I just paint over the mould on my bathroom ceiling?
No. Painting removes the colour and leaves the moisture, so the mould returns within weeks across a wider area. The US Environmental Protection Agency advises fixing the water source and drying materials within 24 to 48 hours; coating over active growth achieves neither.
Is efflorescence on bathroom tiles a serious problem?
Yes. Efflorescence is calcium and alkaline salts dissolved out of the screed by moving water and deposited as it evaporates, which makes it chemical evidence that water is inside the substrate. Wipe it away; if it returns within a week it is efflorescence rather than cleaning residue.
What is the difference between cosmetic grout staining and waterproofing failure?
Cosmetic staining is uniform, follows the traffic pattern and lifts with grout cleaner. Water absorption is patchy, concentrates in the shower zone and near the floor trap, and returns within a week of thorough cleaning. Slow drainage after showering, beyond about 30 seconds, points to a falls problem.
How urgent is a water stain on the ceiling below the bathroom?
Act within 72 hours. Water has crossed the reinforced concrete slab, damage compounds daily, and prolonged exposure begins corroding the reinforcement inside the slab. Notify the unit below in writing, and the MCST in a strata development, because that record supports any later cost-sharing resolution.

Sorry, the comment form is closed at this time.